DOLCEAMERICANA.BLOG

Dying Easter Eggs
Have a little extra fun this year dying your Easter eggs! Create themed eggs!
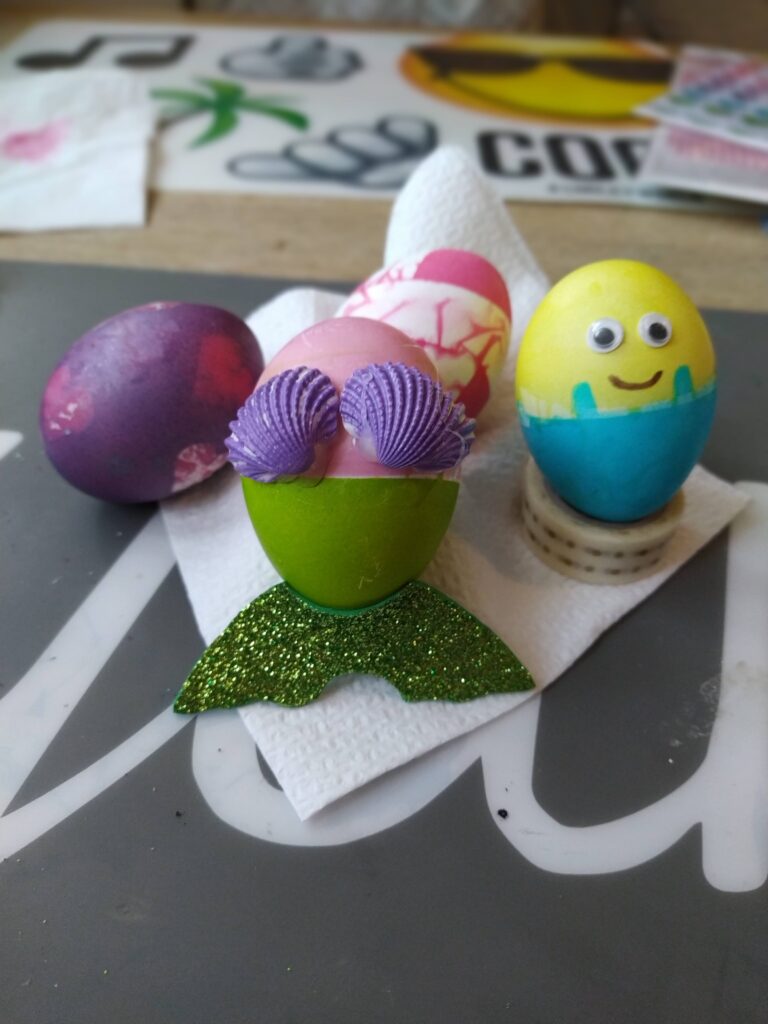
We had fun this year creating a few characters for our eggs! Create your own characters with us! It’s easy and fun.
Supplies:
- Hard boiled eggs
- Food coloring
- Vinegar
- Edible pens are great for adding details like a smile, eyes or a nose
- Decorations: googley eyes, green foam paper and mini shells to make a minion and the little mermaid.
- Other easy decorations: Washi tape and stickers
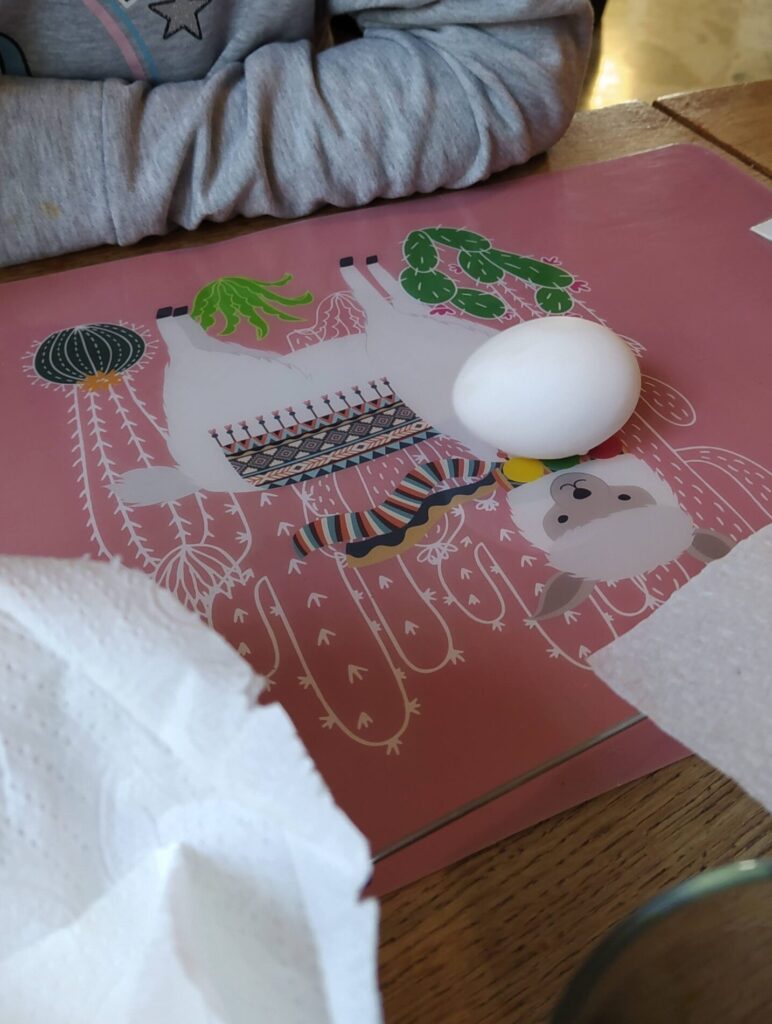
Begin by boiling your eggs: Place your eggs at the bottom of a sauce pan and fill with lukewarm water. Place on stove top on high heat, when the water begins to boil remove it from the heat with the lid still in place. Set it aside with the boiling water for the amount of time you prefer according to the below indications:
- 4 min: To make a running yoke
- 6 min: Medium cooked yoke
- 8 min: Well cooked yoke
- 10 min: Solid, firm egg yolk
When the time is up, remove the egg with kitchen tongs and place it in a bowl of cold water to chill. Once it has cooled you can begin dying your eggs!
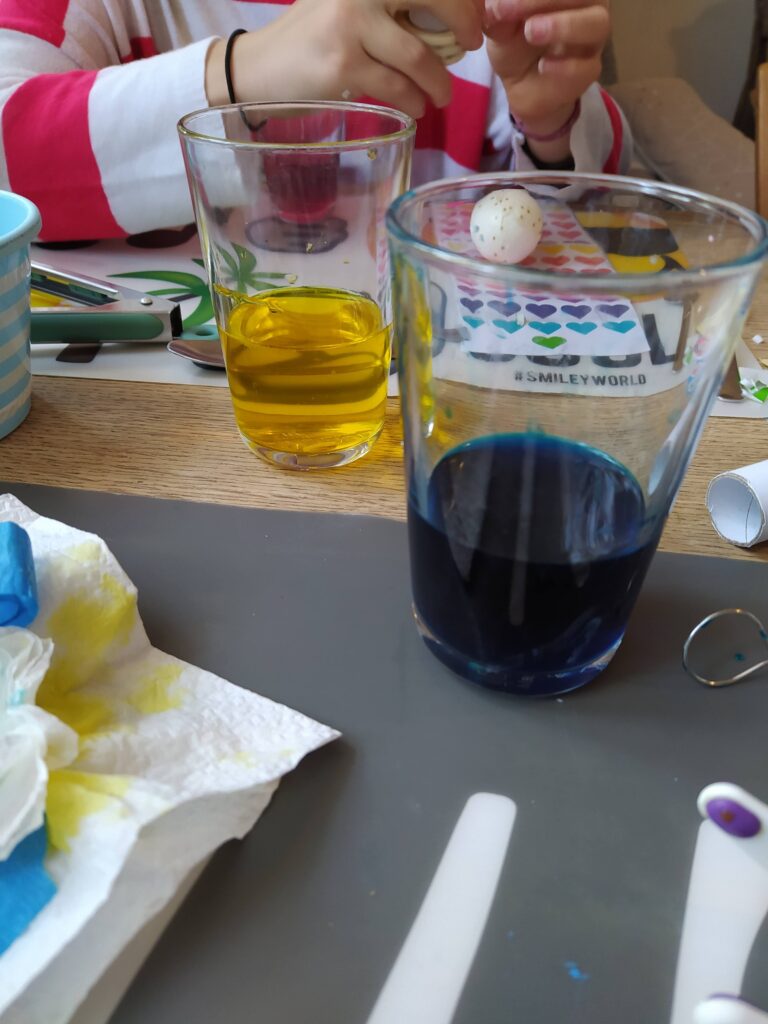
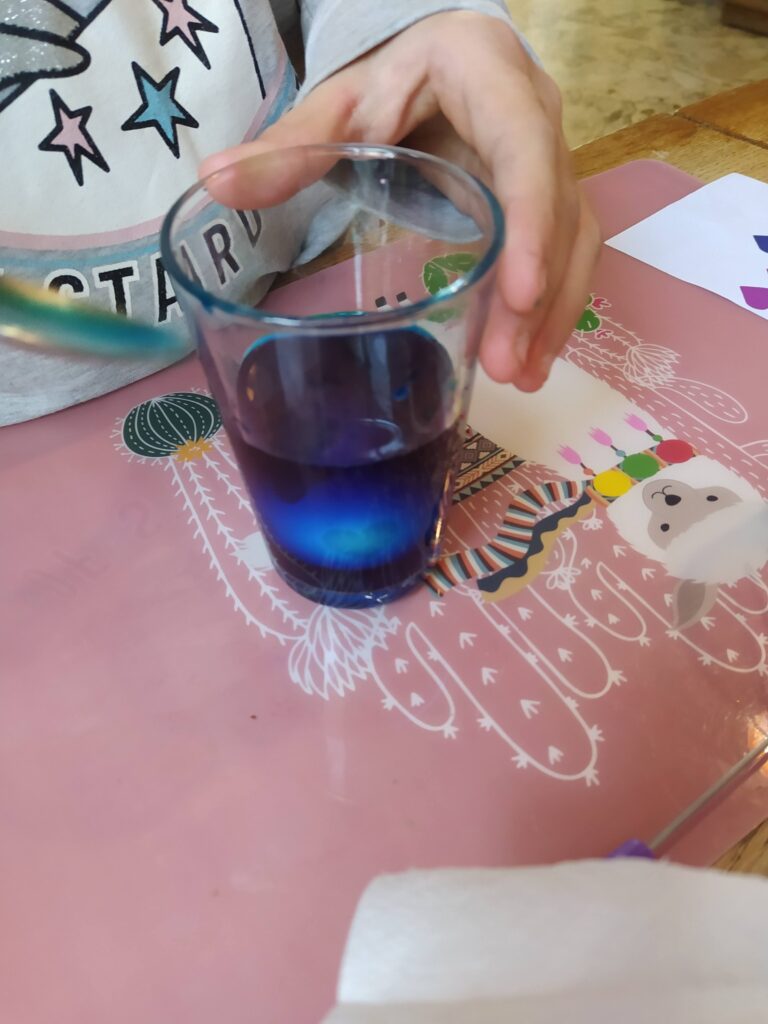
Next make your dye for your eggs: Mix 1/2 cup boiling water, 1 teaspoon vinegar and 10 to 20 drops food color in a cup to achieve desired colors. Repeat for each color.
Pour each dye into a shallow bowl or cups. Make sure you cover your table with a plastic table cloth or mats and have plenty of paper towels on hand.
To Create A Minion:
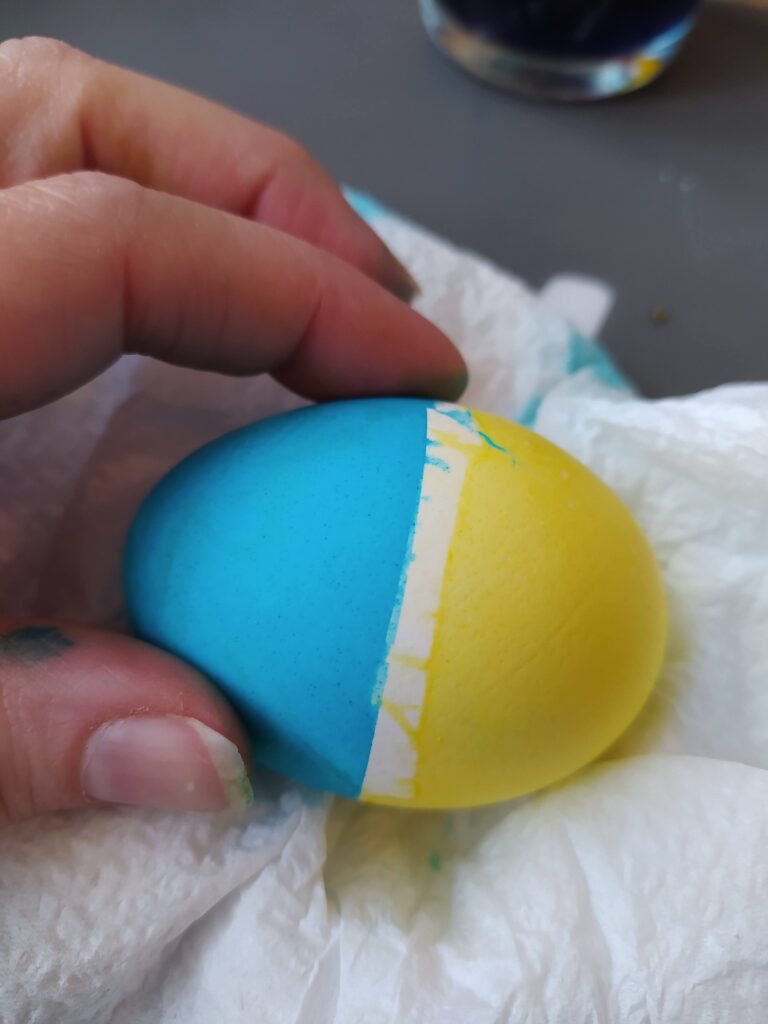
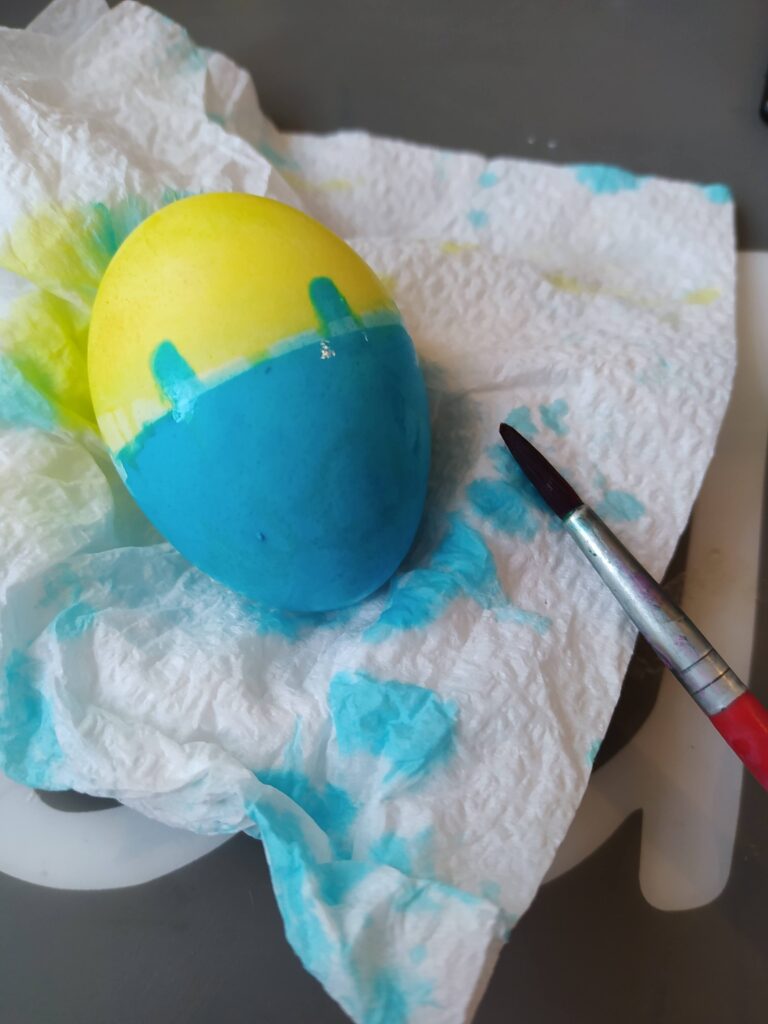
Dye one half of your egg yellow. Allow it to dry so it doesn’t drip. When it is dry, dye the other half blue. Allow to dry,
With a small fine point paint brush use the blue dye to draw on your overall straps and cover any white
When your eggs is completely dry add your googley eyes, or eye depending on which Minion you are trying to create.
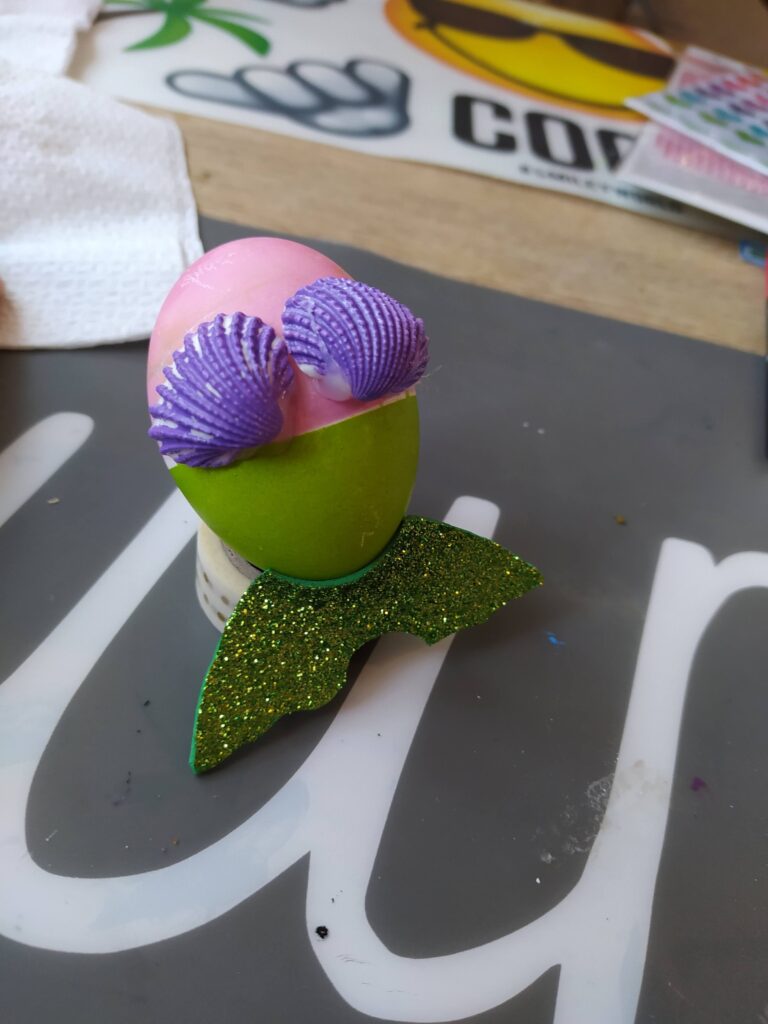
To Create the Little Mermaid:
Use the same steps as the minion. Dye one half of your egg pale pink, and the other green.
Then attach your fin and your small purple seashells (I painted mine purple so they would look like her costume).
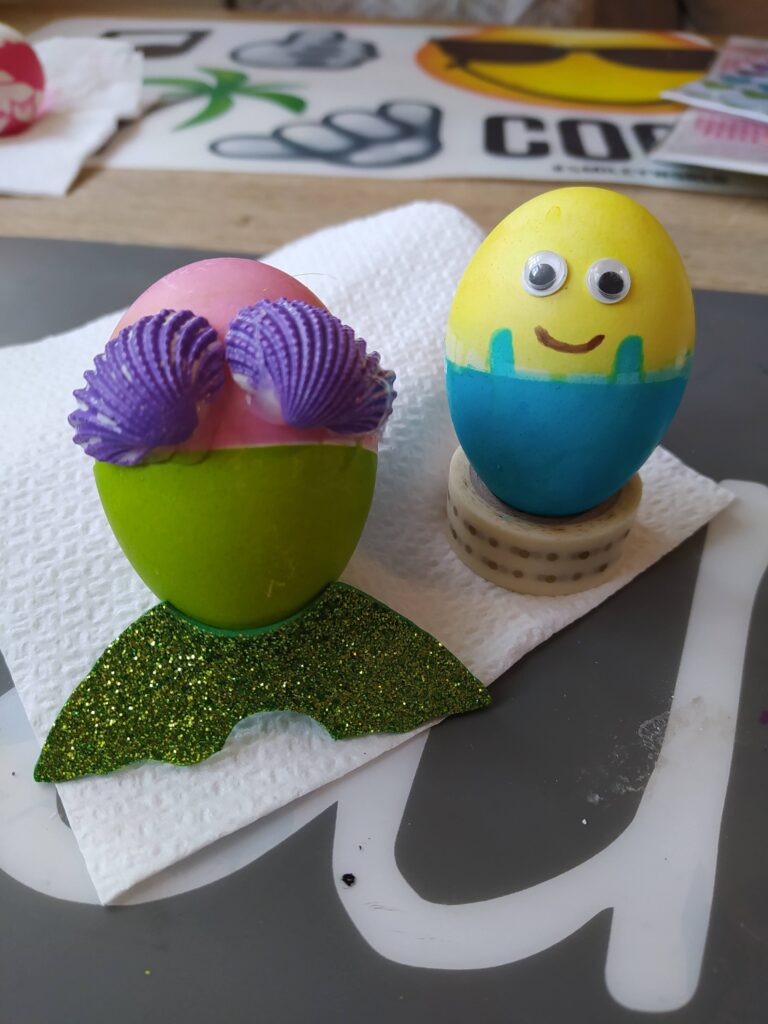
They were both really easy to make but the end results were too cute!
To create an egg with Washi tape or stickers:
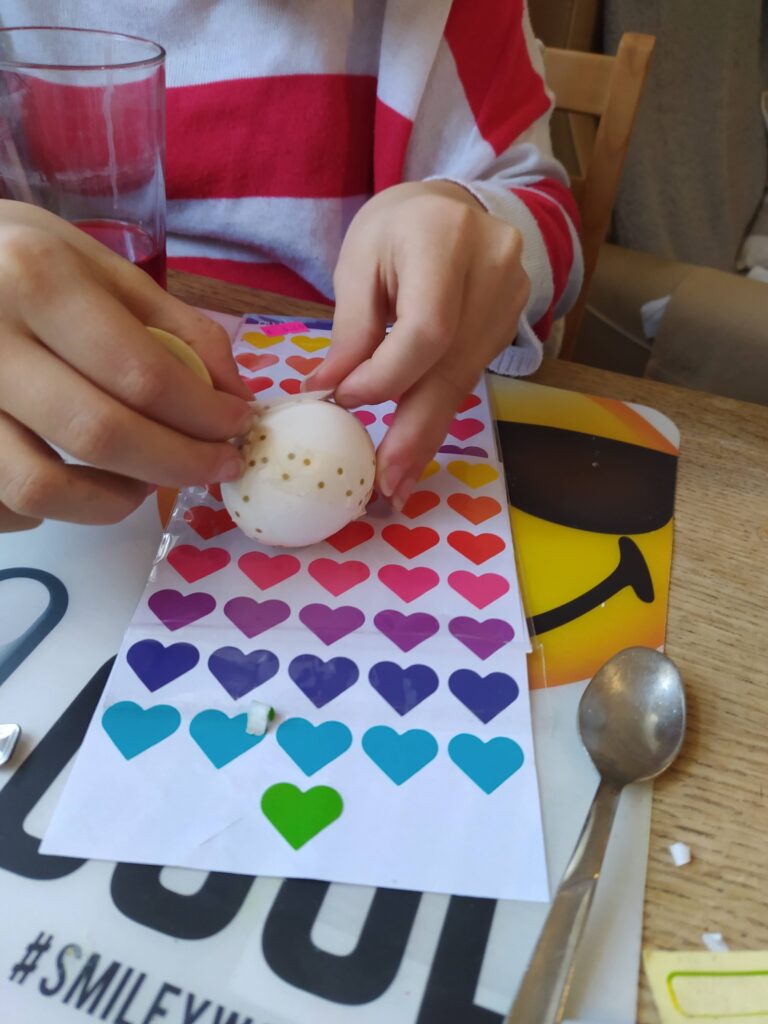
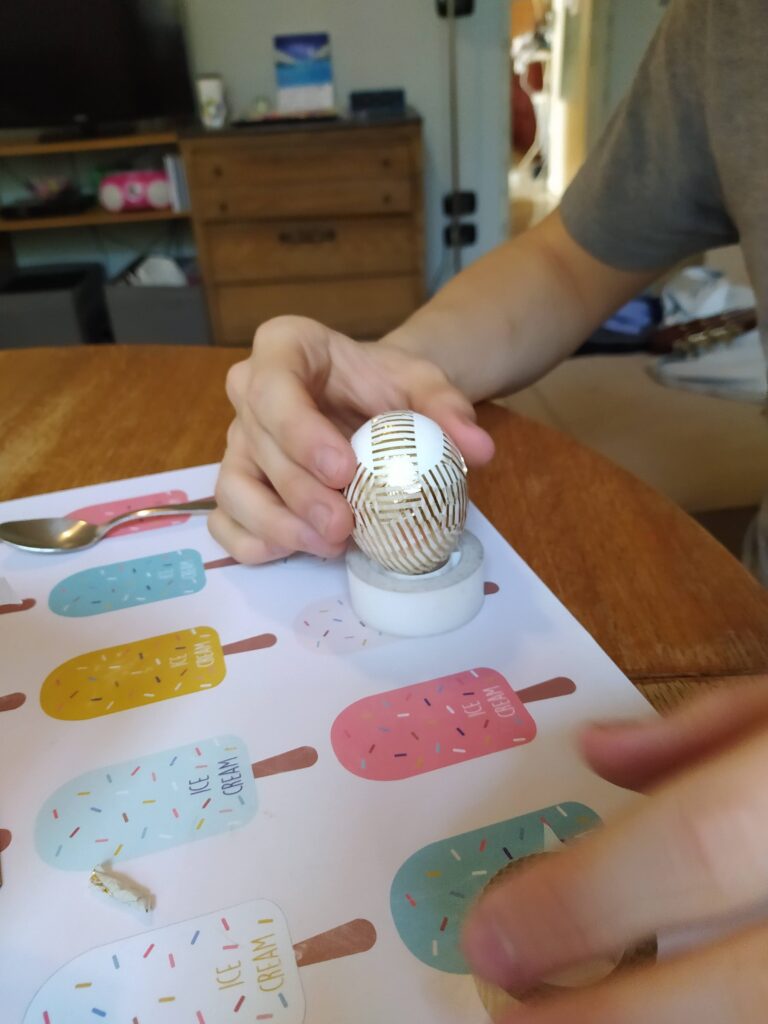
First place your stickers or washi tape in the design that you prefer…stripes, hearts, whatever works.
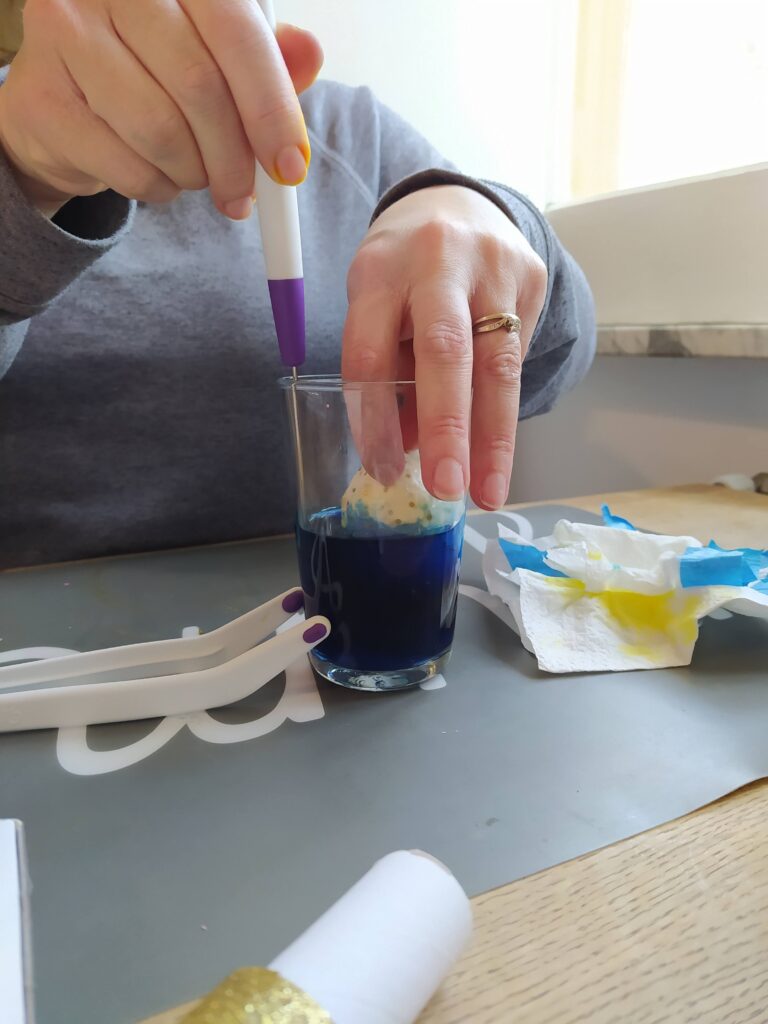
Then dip your egg into the dye. Allow it to dry completely and then remove the tape to reveal your stripes.
If you would like a two toned egg then dye your egg first a lighter colored dye (yellow, pink, red, light blue, etc). Allow to dry completely. Now add your stickers or washi tape.
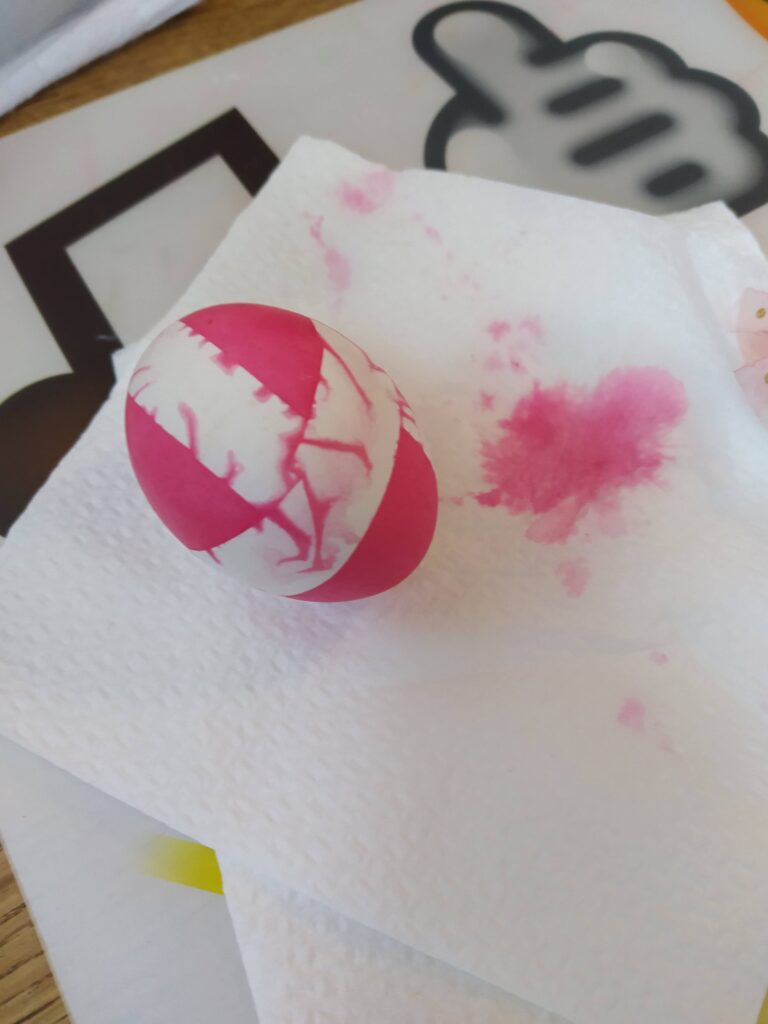
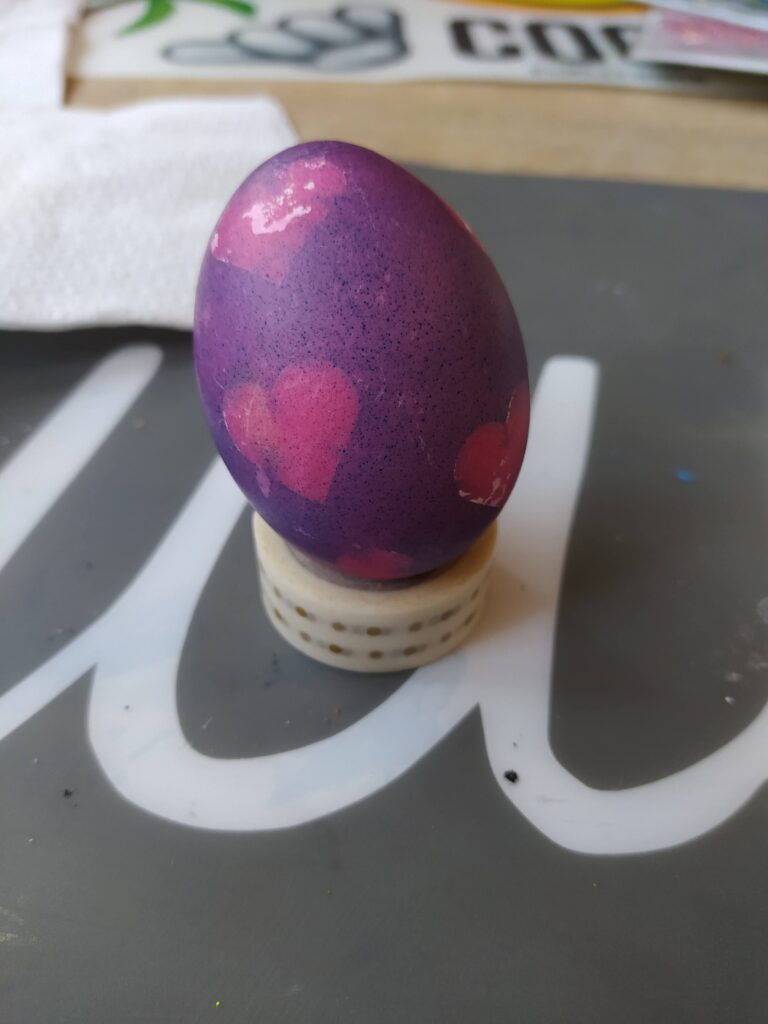
Now place the dye back in a complementary color.
For example: If you used pink, place it in a blue dye. If you used yellow, then place it in a blue dye or a red dye. If you used light blue, then place it in dark red, etc.
Remove it from the dye and allow it to dry completely! Once it is completely dry gently remove your stickers or washi tape. You will have a beautiful two toned egg with the designs that you created!
Whatever you do have fun! Egg dying is just about spending time together, laughing and enjoying the holiday.
Happy Easter and happy creating!
- Luke 24:6-7: “He is not here; he has risen!”
- Philippians 2:8: “And being found in appearance as a man, he humbled himself by becoming obedient to death— even death on a cross!”
- Romans 8:34: “Christ Jesus who died—more than that, who was raised to life—is at the right hand of God and is also interceding for us.”
Welcome to Dolceamericana

I’m Carli. An event stylist, self-taught baker, and imperfect Mamma of 3!