DOLCEAMERICANA.BLOG

Sun Catchers
If you, like me, need something to brighten up these winter days, then these sun catchers are the perfect project for you and your family!
You only need a few basic supplies and they are truly fun to make!
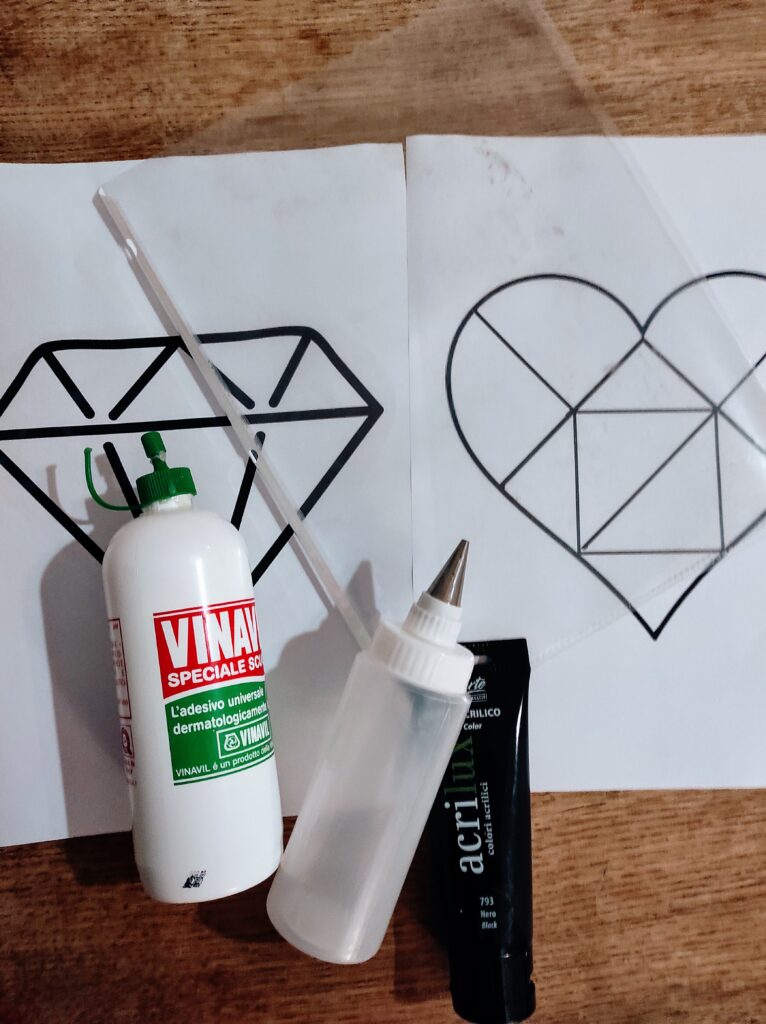
Supplies:
- White glue
- Black acrylic paint
- Squeeze bottle
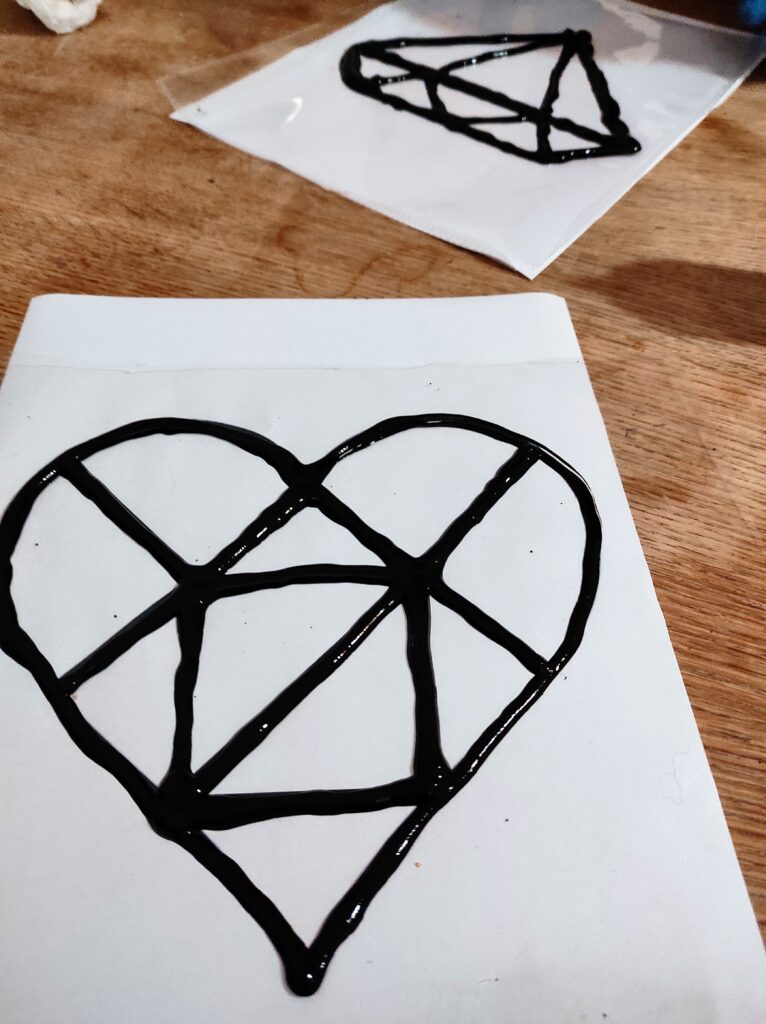
- Plastic document sleeve (see photo). Rigid is best!
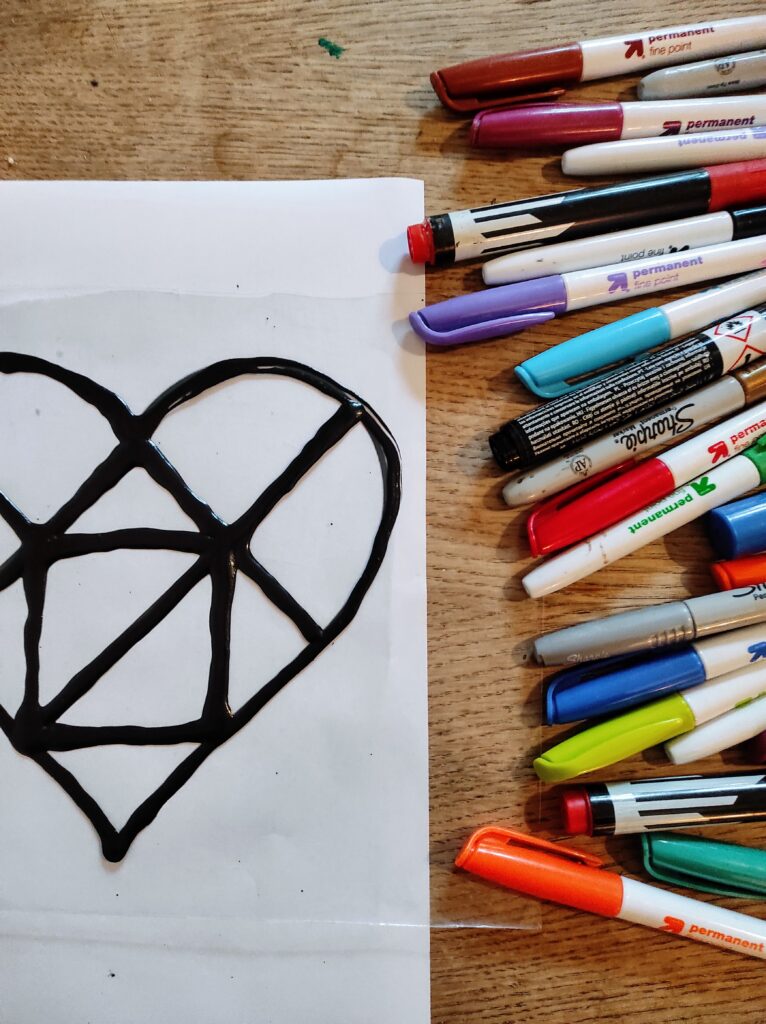
- Colored permanent markers
- scissors
- template

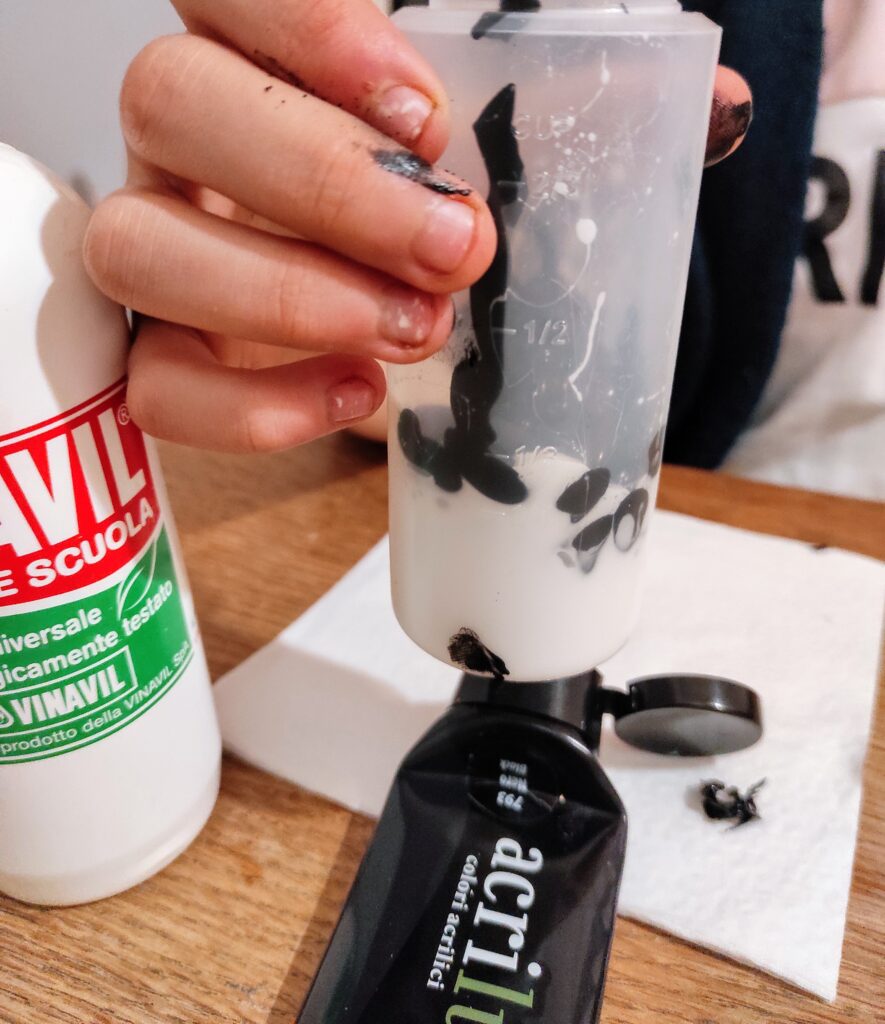
Begin by making your puffy paint for the outline of your sun catchers. You need to mix equal parts white glue and black acrylic paint. Pour the glue and paint into a squeeze bottle and mix well. Use a skewer stick to stir and then shake the mixture well.
Next print out your templates. You can use the two that I have made for you, or you can print out your own image.


Cut your plastic sleeve in half so you have two pieces of plastic. Set the plastic on top of your template so that you can see the image through the plastic.
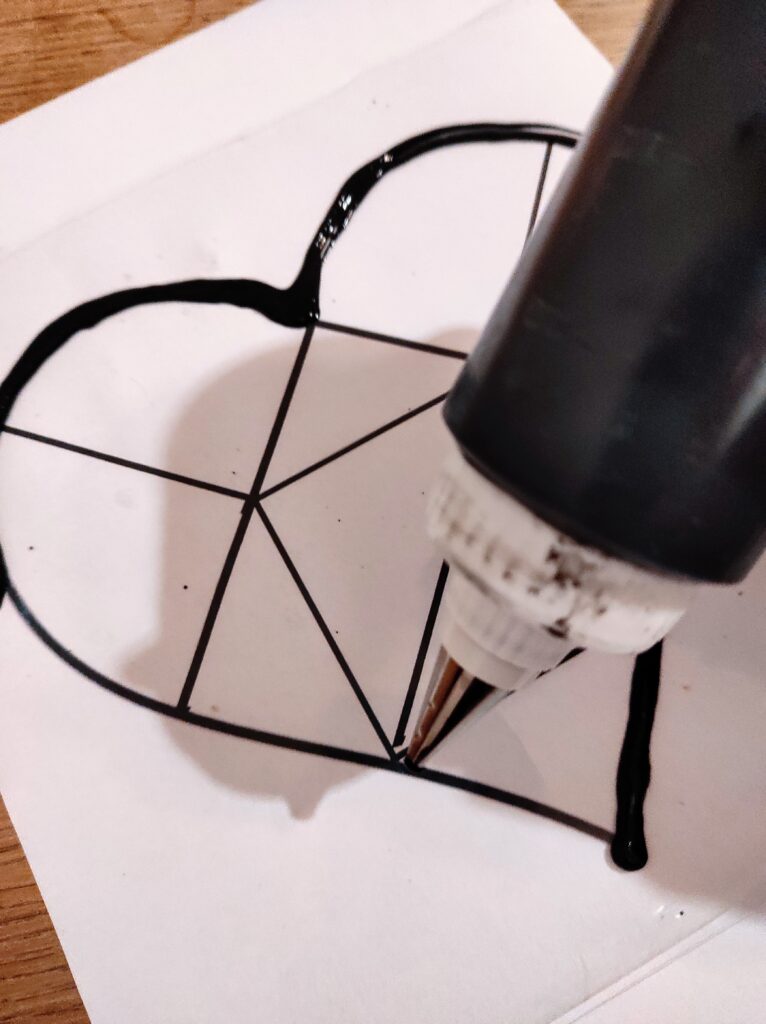
Begin tracing the outline of the image with your puffy paint. When you have finished tracing the whole picture, then set it aside to dry overnight.

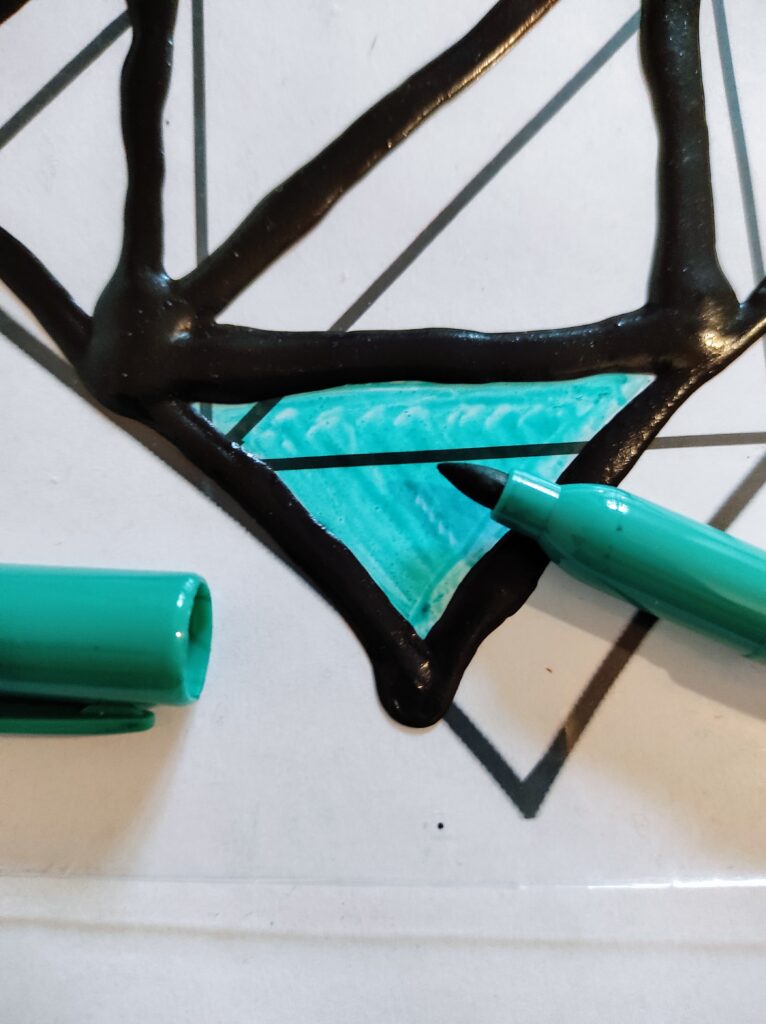
The next morning test you paint to see if it is dry. The thicker you pour it on, the longer it will take to harden. If it is dry then you can begin coloring your image. Using permanent pens color in all the transparent plastic sections of your image. Color the side of your image where the puffy paint is raised.
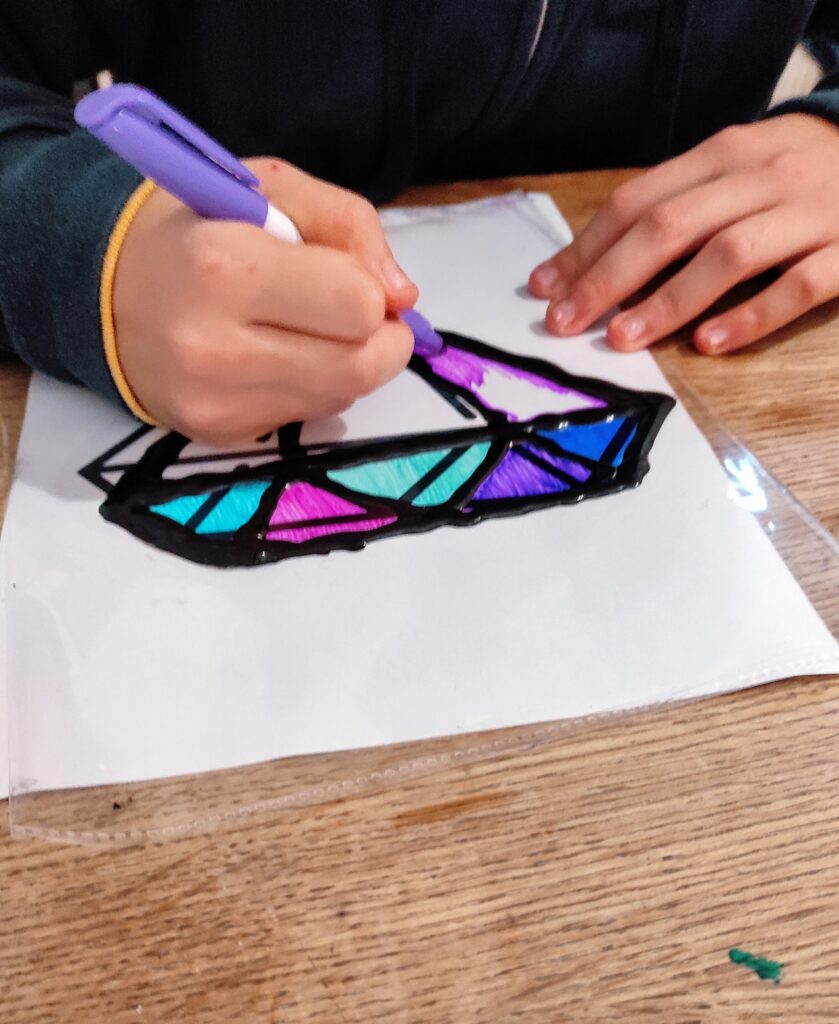
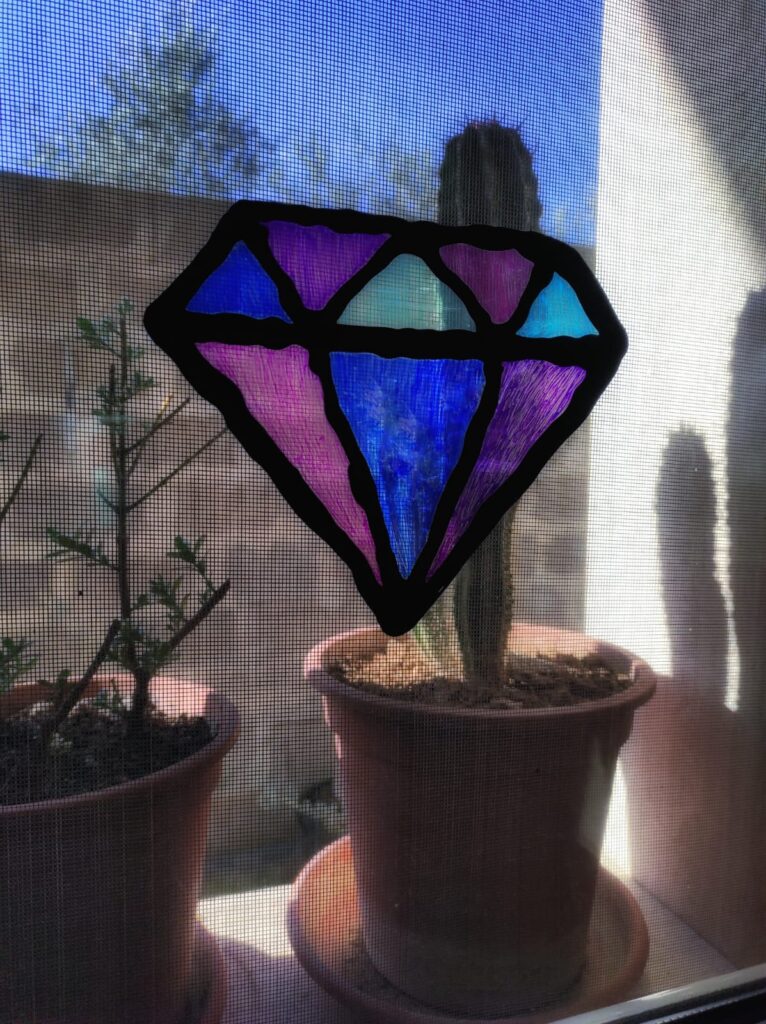
When you have finished coloring your entire sun catcher, then cut it out.


Now you can stick it to your window in two possible ways:
1- Dampen the back of your sun catcher with a very small amount of water. Make sure you do it on the opposite side of the one you colored in.
2- Stick the side of your sun catcher with the raised puffy paint towards the window. The paint itself will help the sun catcher stick to the window.
That’s it!
This project has a few steps to it, but it is really simple and they turn out so pretty and fun!
Happy creating!
Welcome to Dolceamericana

I’m Carli. An event stylist, self-taught baker, and imperfect Mamma of 3!