DOLCEAMERICANA.BLOG

Valentine Card Holders
Love Month Challenge 2021!
Before we get to the fun part and see how to make these too cute love note holders, let’s talk Love Month Challenge.
According to the work of John Gottman and Robert Levenson, who closely studied the effects of negativity with couples, the suggested ratio is 5:1, meaning that for every negative encounter, there should be a minimum of five positive ones to counterbalance the effects of the first.
John Gottman
Words are powerful. Our words can build someone up or tear them down. And the truth of the matter is that we don’t use love words as often as we should.
That is how the love month challenge started in our family. Instead of giving someone a card on Valentine’s Day, we decided to dedicate the entire month of February to showing one another how much we love each other.
It’s easy really!!
Every day we write 1 love word on a note and stick it in each other’s card holder. So maybe I might write Cuddler to my youngest daughter, because I love that about her. Or perseverant, to my oldest son because it is something I love about him. It only takes a few seconds every day, but it is such a great exercise!
Why?!? Because the blessings are two-fold. We bless the other by saying all the things we love about him or her…making them feel loved. But the person who is expressing that love also gets an attitude adjustment as the month goes on! In writing something kind every day, we begin to focus more on the positive than the negative. And it really does something special.
Give it a try! Join the Love Month Challenge this February! I promise you won’t be sorry. Let me know if your family is going to give it a try! For more ideas on how to do this fun activity visit this post!
And now for our envelopes!!!
Supplies:
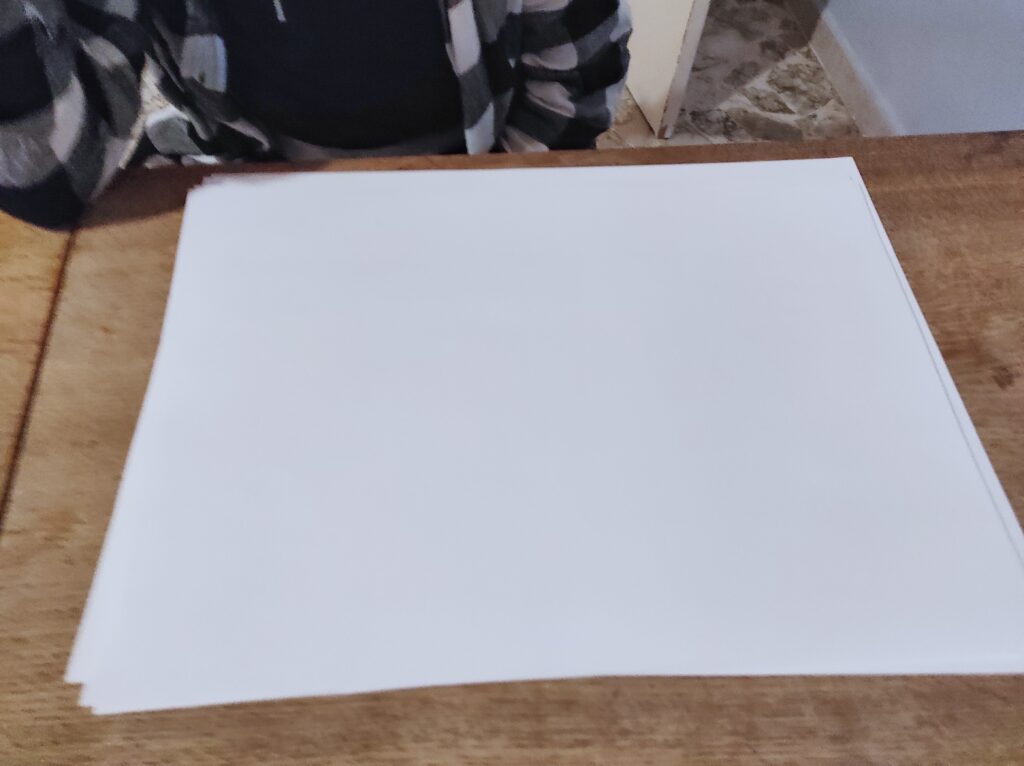
- Large Paper (we used IKEA’s 16x11in paper)
- Scissors
- Stapler
- Supplies to decorate your envelope: googley eyes, colored paper, glue, ribbon, glitter, anything else you might need!
Instructions:
First you need to make your oversized envelope. Then you will decorate it. There are two ways to fold your envelope, depending on the shape you desire to create.
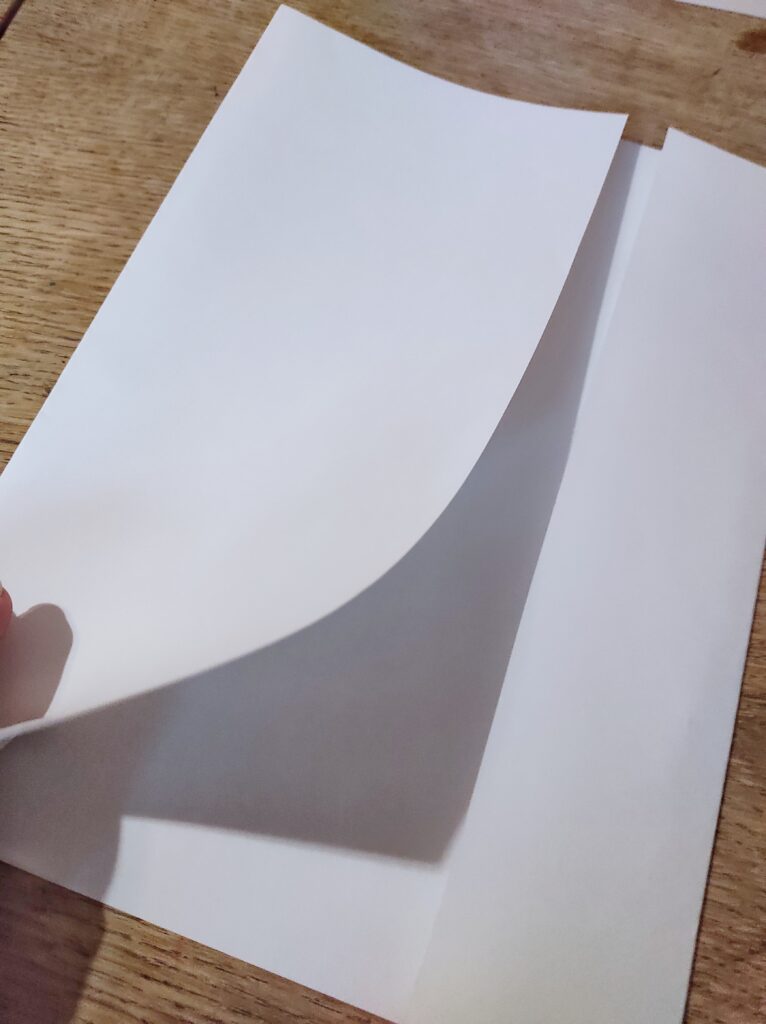
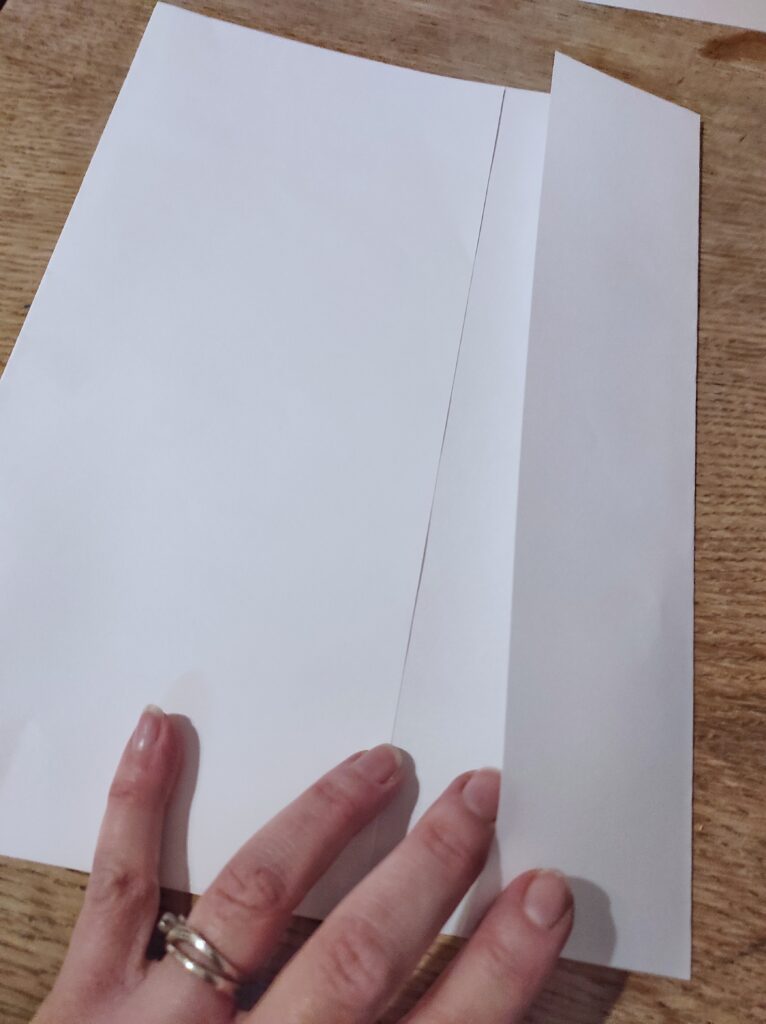
Version 1: Vertical Fold


This one is super easy and perfect for vertical or long shapes, such as the gnome that we created.
Just fold the paper in half. Staple all around the open edges (or seal them with tape if you prefer). The staples don’t need to be too close together because your envelope will be holding cards, and not small objects.
Cut a slit into your envelope 1.5 inches down from the top of your paper when laying vertically on the table. It should be 1.5 inches tall and almost as wide as the envelope (leave an inch on each side of your slit).
Version 2: Horizontal Fold
The horizontal envelope is perfect for wider objects such as a monster’s mouth or a donut.
Fold a 2 inch flap over with one end of the paper, and then fold the other side up leaving approximately 1.5 inches between the two folds (see photo). Creating a wide “envelope” style shape (in the photo the paper is positioned vertically, but you will see later that it is used laying horizontally).
Staple all around the open edges of the envelope you created (or use tape to seal the open edges shut).
Now that you have created your envelope base, decorate it!
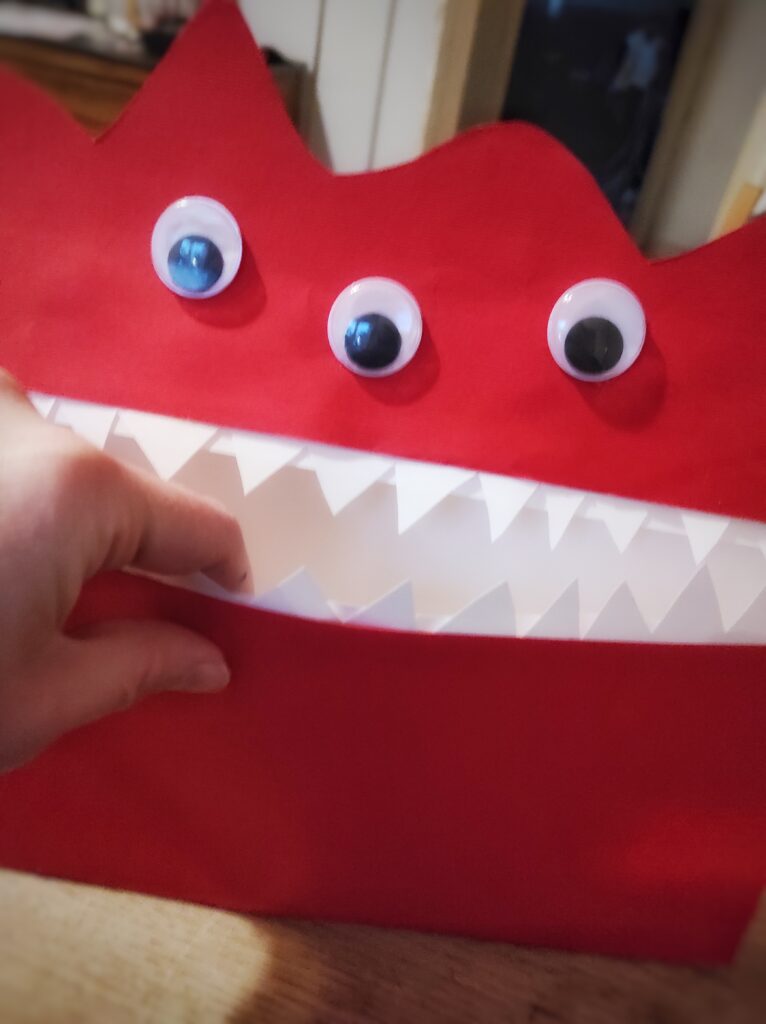
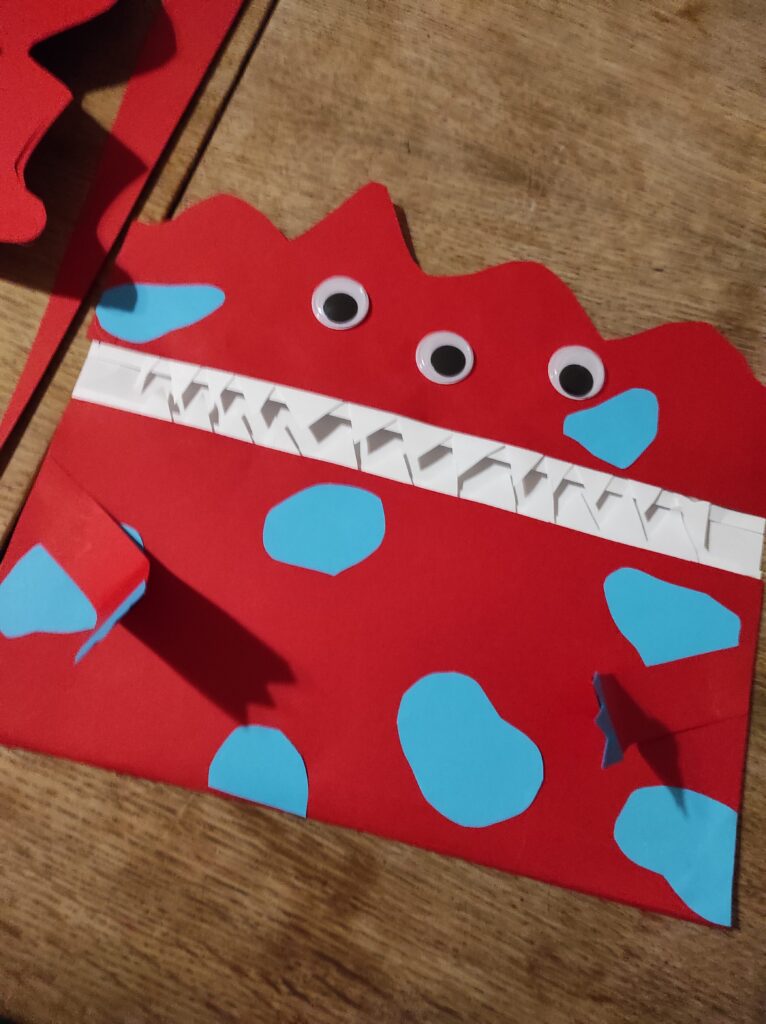
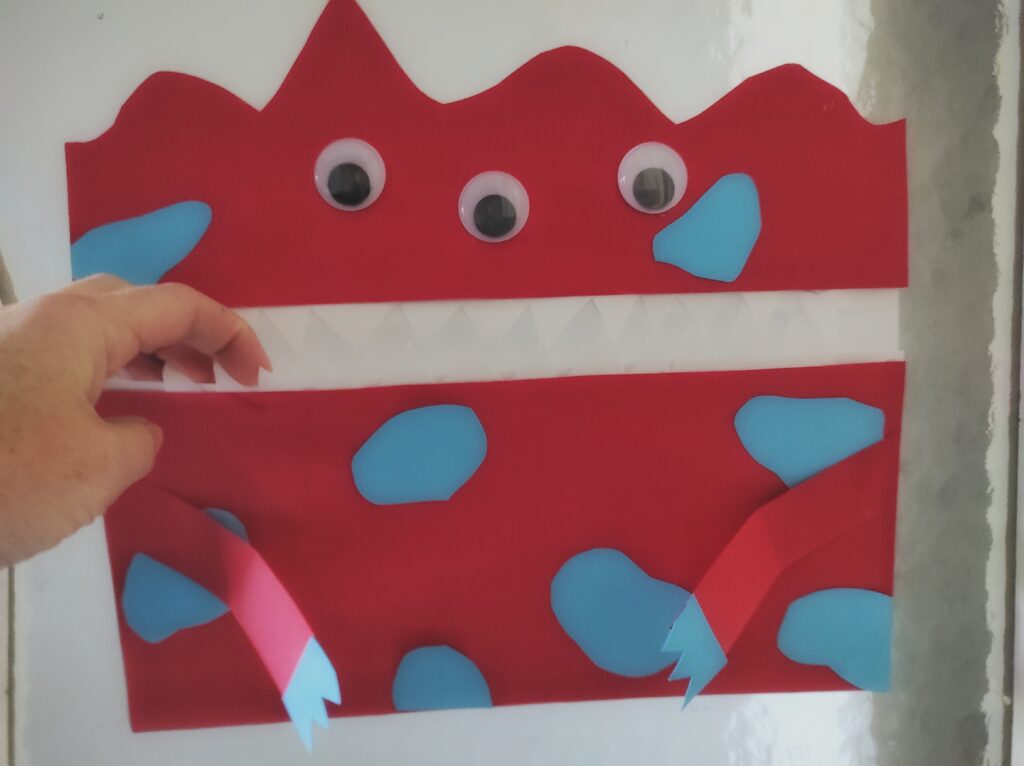
To make the love-monster:
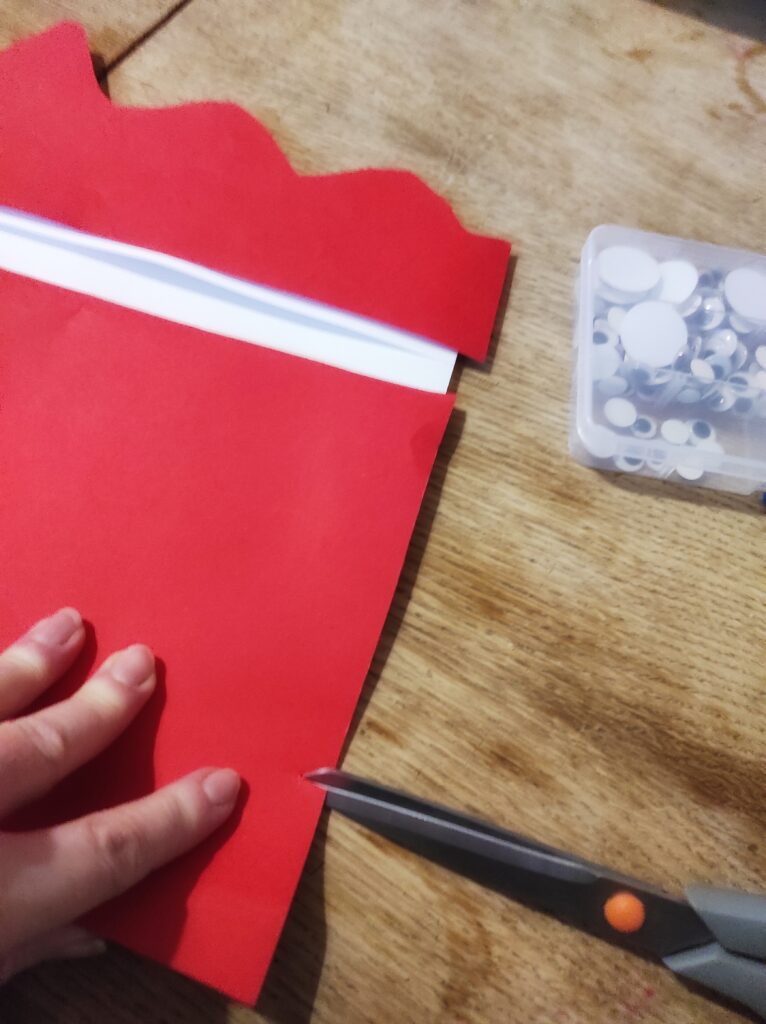

Use the horizontal envelope! Cut out paper red paper the width and length of the bottom flap of your envelope. For the top I added a little height to the measurements with the waves.
Next cut out your monster’s teeth. I cut out a 1.5 inch tall strip of paper that was the width of my envelope. Then cut in a zig zag motion creating a sharp teeth-like shape down the exact middle of your strip of paper. You will end up with two sets of teeth.
Glue your teeth to the inside of your red paper so that they stick up over the slit in your envelope.
Glue your colored paper to your envelope. I used a hot glue gun because I was using card stock paper.
Decorate as you please! I used googley eyes and colored paper to make spots and arms on my little love-monster.
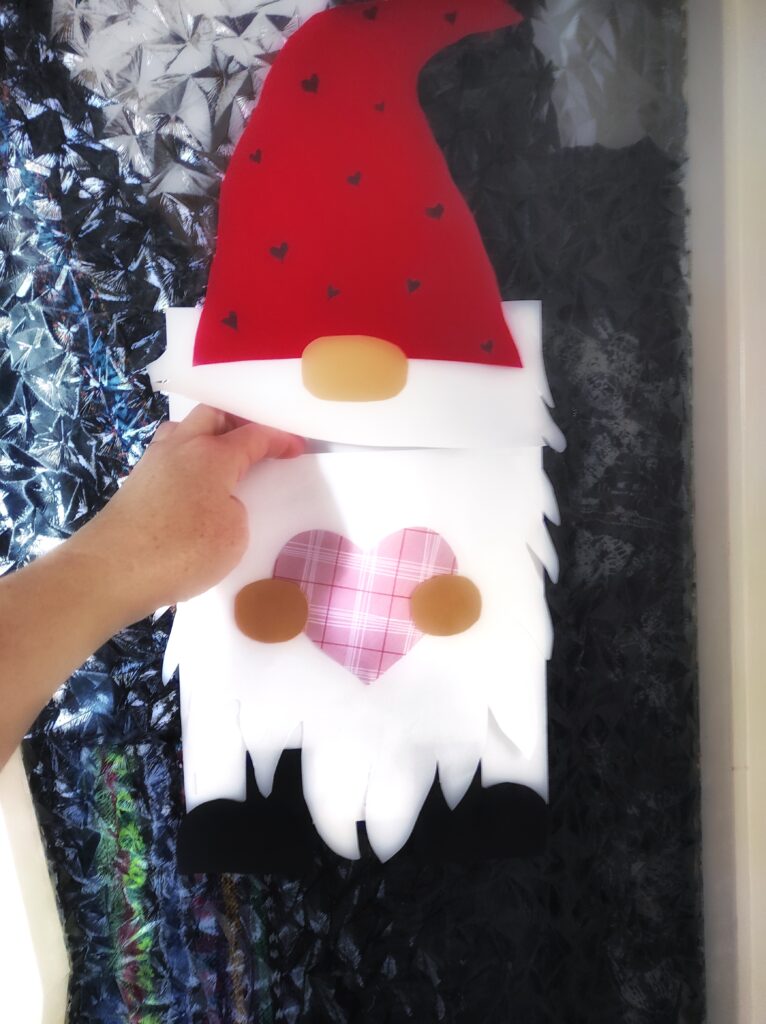
To make the gnome:
Use the vertically folded envelope.
Cut out your gnome hat. It should be slightly less wide at the base than your envelope.
Cut out your gnome beard. It should be the length and width of your entire envelope. You want to create the beard by making the wisps of his hair/beard curving into a point at the base of you envelope once you have cut his beard out (when you are done, the beard will not cover the entire base of your envelope but should continue to cover it’s width).
Now you need to cut the beard in two pieces. Too measure where to cut your beard place it on top of your envelope upsidedown and with a pencil draw a light line where the lower edge of your slit it. Trace that line across the width of your beard and cut it out. Then you will have two pieces of beard. Piece 1 is long enough to sit from the top of your envelope and to hang over your slit. Piece 2 will line up with your slit and reach to the base of your envelope (see photo).
Glue your beard on. MAKE SURE THAT YOU DO NOT GLU OVER YOUR SLIT! Glue only the top part of piece 1 of the beard so that the bottom half can be lifted up. Before you glue on piece 2 of your beard, add your boots to the bottom of your envelope. Then glue on piece 2.
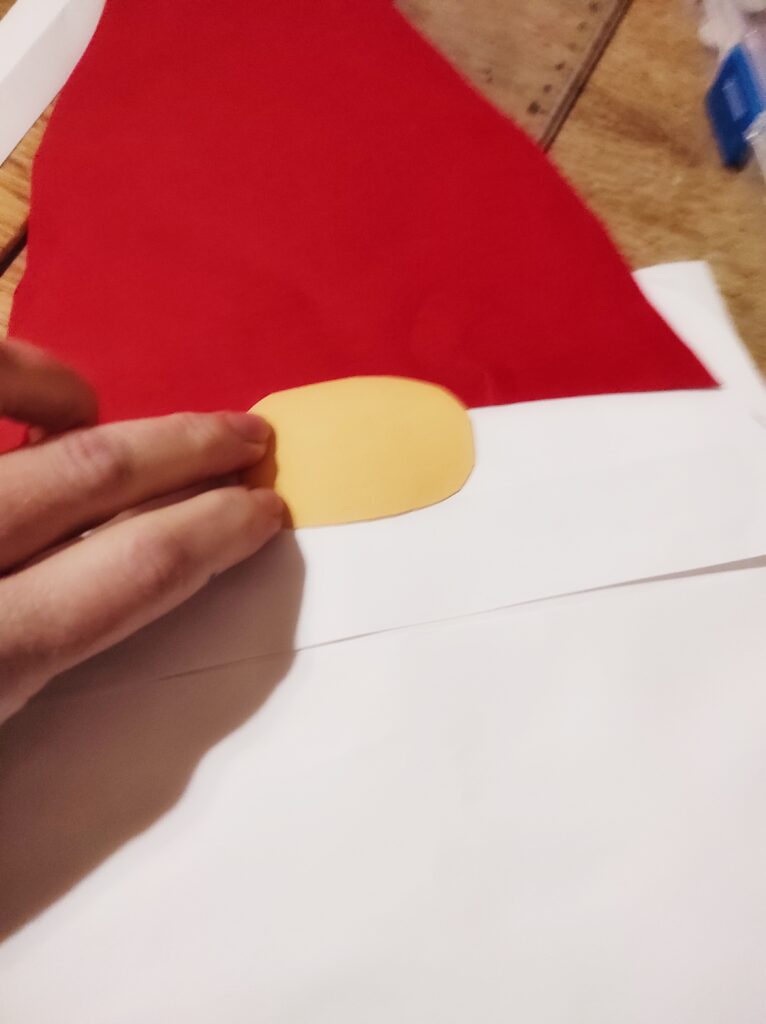
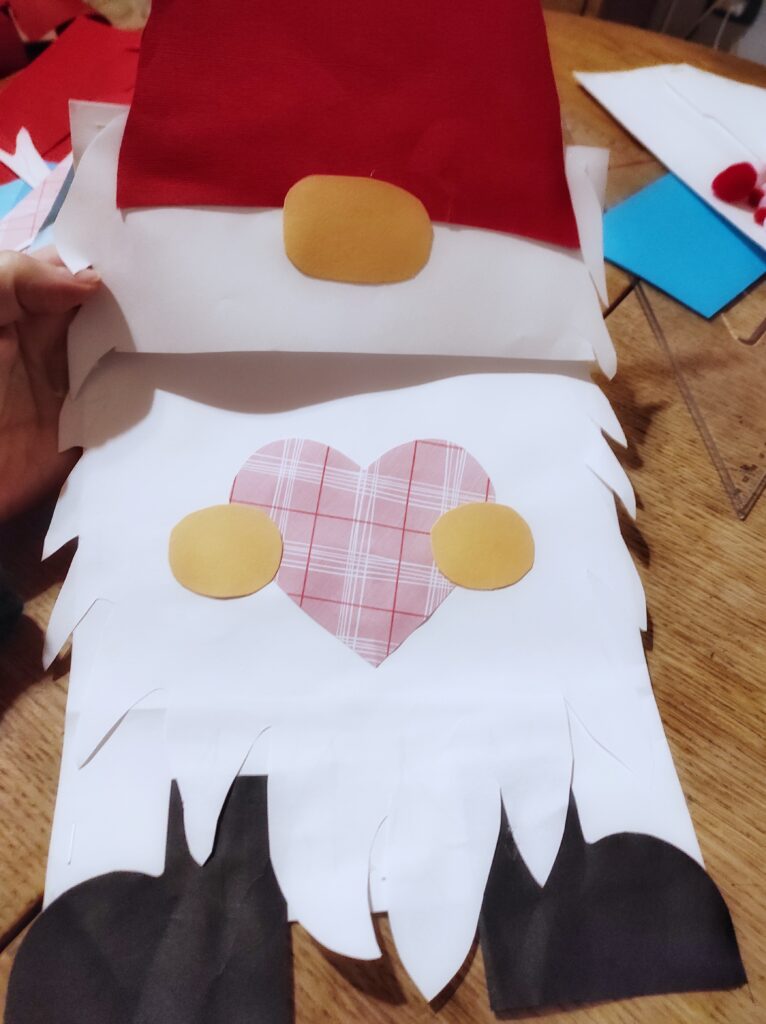
Now that you beard is in place add on your other decorations. First your hat! Then glue the nose so that it is sticking out above the hat (see photo). Next glue a sweet heart for your gnome to hold, and last glue on his little hands on either side of the heart.
We also created a heart and a donut and a penguin!
There are so many fun ideas for these envelopes! The most important part is not what you decide to create, but that you join the love month challenge as a family!
And these cute envelopes are a fun way to make this celebration even more fun!
Happy creating! Let me know what shape you choose to make!
One Comment
Love this idea!!!